


Death Rider Kustom Company – Patch


Death Rider Kustom Company – Patch
10,00€
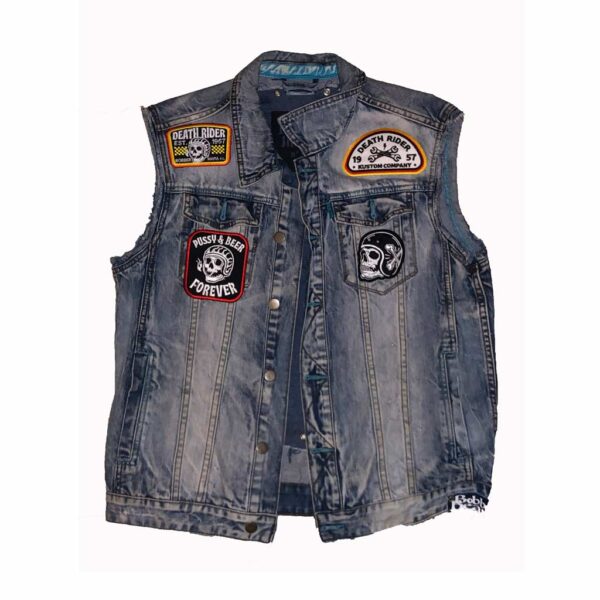
Death Rider Kustom Company patch by Death Rider, your ideal patch, with wash-resistant embroidery and easy attachment.
For unique clothing and exclusive style.
Choose one of our biker patches to proudly show your affinity to the Death Rider values.
The best way to communicate your passion and love for motorcycling to others.
Kustom Company Patch: Identity, belonging, style.
If we talk about motorbikes, we talk about patches. As our Death Rider Kustom Company patch by Death Rider, patches and motorcyclists have long been one only thing in the collective imagination. Not least because a true biker cares about essence, but also about appearance. And belonging. Motorbike patches are a strong distinguishing element that marks the identity of the biker. At the same time the desire to distinguish – an item of clothing, an accessory – and to stand out.
Patches have evolved over time from simple means of repair to small objects of art. The chance to personalize an anonymous garment, to make it unique and at the same time part of something is too great a temptation for a biker. Of course, you have to give in to temptation, and nobody knows this better than motorcyclists.
Bikers love to tell their stories through patches. With the Death Rider 1957 patch you can tell your story, your world. You can attach this thermo adhesive patch to your motorbike clothing and all you have to do is open the throttle.
Patches, useful to identify and unite
The meaning of the word Patch is cover, mend. A repair function. Yes, because the humble origin of embroidered patches was precisely this: to patch holes or cover indelible stains on clothes (bleach, grass, etc.).
With the passage of time, however, its use changes completely and becomes something more. The embroidered patch became ‘fashionable’ and people used it for two different reasons: to identify and to unite. And so do our Death Rider Kustom Company patch.
It is in the military and war field that patches begin to take on the meanings that are so familiar and obvious to us today. The US Navy was the first to use them to symbolize that they belonged to a group (military): I do identify with this association/ group/etc. There is no doubt that if a person is willing to stick a patch on a piece of clothing and wear it, it means that he or she feels part of what that logo represents: be it the values, the traditions or who is part of it.
Consequently, we see the second use: the patch unites people. People who wear a garment with the same embroidered patch feel united, they feel part of the same family. And the Biker family is a family to all intents and purposes: it’s not unusual for patches to tell the story of the biker’s long journey and life, his band (usually found on the heart), historical gatherings, twinned bands and much more! Therefore, Bikers wear patches primarily for a narrative function: behind each one there is a story to tell, it is a symbol that tells the values, the history of your association or membership and the pride of the people who are part of it.
Specifications and correct use
Each Death Rider’s patch is stitched with high-quality thread and careful technique, so the patches are durable and long-lasting. The last thing you want to worry about when you’re on the asphalt is whether your Death Rider Kustom Company patch will follow you on your journey! Get the reliability you are looking for with our products, which combine high quality with a competitive price.
How to Iron the Death Rider Kustom Company Patch
Firstly, lay your cloth on a flat, heat-resistant surface like an ironing board. To ensure the item will provide a good surface for the patch, iron it first. If it’s a backpack or another item that’s difficult to iron, do your best to arrange it so that the part of the fabric that will be receiving the patch is flat against a hard surface. Place the patch in the position you chose. The adhesive side should be flat against the base fabric. Make sure that the patch isn’t crooked.
On embroidered patches, the adhesive side is the underside. Heat up an iron. Turn it to the hottest setting your fabric can tolerate. Then, make sure to turn off the “steam” option, and that your iron isn’t full of water. Place a thin towel over the patch. At this point, take care not to disturb the position of the patch. The towel will protect the patch itself and the surrounding fabric.
At this point, position the heated iron over the patch and press down. Hold the iron there for about 15 seconds. Apply as much pressure as you can by pressing down firmly. Remove the iron and allow the patch to cool. Lift the towel and check to see whether the patch is fixed on securely by gently rubbing at the edge with a finger, trying to lift it. If it lifts up a bit, replace the towel and press it with the iron again for 10 seconds.
Only logged in customers who have purchased this product may leave a review.
Related products


Reviews
There are no reviews yet.